
Bloons Blitz Bosses: Boss List and Battle Strategies
Learn how to fight Bloons Blitz bosses, handle O.R.B. minions, prepare your monkey team, and stay mobile through boss battles with practical survival tips.
Jump to
How Bloons Blitz Boss Battles Work
Bloons Blitz bosses can turn a comfortable run into a scramble once a shield closes around your Hero. That smaller fighting space makes your upgrade choices and movement matter immediately, especially when the boss brings extra Bloons into the battle. Prepare for Bloons Blitz bosses by building reliable damage, keeping an escape route open, and learning which enemies need your attention first.
Blitz combines survivor-style action with upgrades chosen during each run. You move your Hero through waves, collect Blops for experience, recruit Monkeys, and strengthen the team as the adventure develops. Boss fights put that growing team under pressure inside a restricted area.
When the “Boss Battle!” notification appears, a shield confines your Hero within fighting range of the boss. A victory either returns you to the regular stage or completes it. After a boss defeated partway through a stage, the shield gradually disappears.
Use the warning to check your surroundings. Move toward available space instead of chasing a pickup through a crowded patch of Bloons. Once the enclosure forms, watch both the boss and the smaller enemies around it.
Boss Bloons also resist certain effects and consume pierce. Keep damage in your upgrade plan rather than depending entirely on control effects. If an attack passes through ordinary Bloons, avoid assuming it will interact with a boss in exactly the same way.
Your immediate priorities are straightforward:
- Keep room to move inside the enclosure.
- Respond to enemies that threaten your escape path.
- Follow the boss’s specific damage requirement.
- Stay alert when the fight ends and regular gameplay resumes.
Official page: Bloons Blitz (ninjakiwi.com)
Bloons Blitz Bosses: Names and Behaviors
The named boss lineup includes MOAR, CTRL, Wild Zebra, O.R.B., Super Ceramic, and Mini MOAB. Use their appearances to recognize them, then prepare for the behavior each boss brings to the encounter.
| Boss | Identifying feature | Battle behavior |
|---|---|---|
| MOAR | Red, dirigible-patterned Bloon | Releases Bloons and uses stomps to send out additional waves |
| CTRL | Green Bloon with a circuit-board pattern, mounted on a machine | Sends Bloons toward your Hero |
| Wild Zebra | Boss shaped like a zebra’s head | Recognizable by its zebra-themed design |
| O.R.B. | Light blue boss Bloon | Summons minions that must be defeated before you can damage the boss |
| Super Ceramic | Ceramic-themed boss | Tougher than an ordinary Ceramic Bloon |
| Mini MOAB | Small MOAB | Recognizable by its compact MOAB appearance |
MOAR: Watch the Extra Bloons
MOAR creates pressure by releasing more enemies, including Red and Blue Bloons. Its stomps also unleash waves, so the boss itself is only part of the encounter.
Watch the smaller Bloons as they spread into your movement space. When a fresh wave crowds your route, redirect toward an opening instead of pushing through it to remain close to MOAR.
Include attacks that can handle groups while developing your damage. Piercing boomerangs, tack spreads, and explosive shells all belong to the team’s available arsenal. Choose among the upgrades offered during the run, and address crowd pressure before it makes the enclosure difficult to navigate.
CTRL: Account for Enemies Coming Toward You
CTRL stands on a machine that sends Bloons toward your Hero. Keep watching the route between incoming enemies and your current position.
Move toward open space when those Bloons approach. Avoid spending so much attention on CTRL that you overlook the enemies reaching you from another direction.
If repeated attempts end because smaller Bloons surround you, adjust your upgrade choices to address those groups. Increasing damage against the main target alone does not address the movement problem that caused the loss.
O.R.B.: Defeat the Minions First
Among the Bloons Blitz bosses, O.R.B. summons minions that must be killed before the boss can take damage.
Check for surviving minions whenever your attacks stop making progress against O.R.B. Reposition to bring those enemies within reach of your team’s weapons, then return your attention to the boss once they are defeated.
Build enough coverage to fight enemies around the arena. A setup focused on one target still needs to handle O.R.B.’s supporting enemies before that boss damage becomes useful.
Wild Zebra, Super Ceramic, and Mini MOAB
Recognize Wild Zebra by its zebra-head shape and Mini MOAB by its small MOAB appearance. Super Ceramic is tougher than an ordinary Ceramic Bloon.
For these encounters, watch the enemy’s actual movement and your available space. Keep attacking while avoiding contact, and adjust your route when other Bloons crowd the enclosure.
Avoid carrying assumptions from another Bloons game into the fight. Choose upgrades around the weapons, enemy behavior, and restrictions you encounter in Blitz.
Build Your Team Around the Fight
Preparing for Bloons Blitz bosses starts during the waves leading up to them. Each upgrade choice develops your Hero or allies, and deeper investment in a single path can lead to powerful epic weapons.
Choose a direction for your damage, then fill the gaps that threaten the run. If ordinary waves keep forcing you into narrow openings, consider an offered upgrade that improves group coverage. If you can move comfortably but struggle to finish tougher enemies, strengthen an existing attack.
Heroes bring different signature weapons and styles. Quincy shoots arrows that ricochet between Bloons and can develop into arrow storms. Gwen uses fire, while Obyn Greenfoot brings Spirit Wolf attacks.
Pick a Hero whose attack style you can manage while watching the arena. Keep your attention on enemy movement even as weapon effects fill the screen.
Your allies provide several ways to shape the team:
| Ally | Starting attack | Upgrade possibilities |
|---|---|---|
| Boomerang Monkey | Piercing boomerangs | Glaives and explosive shrapnel effects |
| Tack Shooter Monkey | Short-range spreads of tacks in all directions | Further weapon upgrades during the run |
| Sniper Monkey | Long-range piercing bullets targeting strong Bloons | Further weapon upgrades during the run |
| Mortar Monkey | Explosive shells | Fire, stun, and crippling effects |
| Wizard Monkey | Magical projectiles | Seeking projectiles and additional magic |
| Alchemist Monkey | Potions that deal damage over time | Additional potion types, including effects on itself or other Monkeys |
Use weapon range when planning movement. With short-range tacks, weigh the danger of approaching crowded enemies before moving closer. With long-range bullets or seeking projectiles, use available space while those attacks operate.
Remember that boss resistance matters when choosing upgrades. Stun or other effects can be part of an ally’s toolkit, but bosses are immune to certain effects. Continue developing damage rather than making the entire plan depend on disabling the boss.
Outside the run, collectible toys level up Heroes and open new upgrades. Stickers give the team additional boosts. Review those permanent improvements after a difficult attempt, especially if your run repeatedly reaches the boss with insufficient strength.
Use Terrain and Encounters Before the Shield Closes
Bloons Blitz bosses become harder to manage when you reach them with poor positioning or depleted health. Pay attention to the stage before the warning appears.
The October 2026 terrain update adds special stages with constrained layouts, including corridors bordered by trees and desert plateaus enclosed by cliffs. Those boundaries change how much room you have to redirect your Hero.
Look for open stretches as you move. In a corridor, check what is ahead before turning into incoming Bloons. Around cliffs, avoid planning an escape through terrain you cannot cross. When a boss warning appears, prioritize a usable fighting position over a distant collectible.
Encounters provide temporary benefits during runs. Blue spark trails point toward nearby encounter objects, giving you a way to spot opportunities while moving through the stage.
| Encounter | Function | Practical use |
|---|---|---|
| Banana | Restores health | Collect it when hurt if the approach is clear |
| Campsite | Fully restores health | Use it before another fight when you need healing |
| Sun God Amulets | Grant temporary invincibility | Use the active protection to move through immediate danger |
| Berserker Brew | Increases the team’s attack speed | Keep enemies within reach while the boost is active |
| Magnet | Collects Blops from the screen | Use it to gather experience pickups without visiting each one |
Choose your route to an encounter carefully. Healing is useful preparation, but reaching it through a dense group can expose your Hero to more hits.
After activating a temporary effect, pay attention to the fight it can help you handle. Berserker Brew accelerates attacks, while invincibility offers temporary protection; neither should replace watching the space around your Hero.
Before fighting Bloons Blitz bosses, collect reachable Blops and complete the upgrade choices they provide. Experience pickups strengthen the current run, so gather them when you have a clear route.
Turn Failed Boss Attempts Into Better Decisions
A failed encounter gives you a specific problem to solve. Identify what ended the run before changing your entire team.
Were smaller Bloons blocking your movement? Did O.R.B.’s minions survive while you focused on the boss? Did terrain leave you without an exit? Match your next adjustment to that problem.
Use this checklist when preparing another attempt against Bloons Blitz bosses:
| Check | What to look at | Action |
|---|---|---|
| Health | Damage taken during earlier waves | Seek accessible healing encounters |
| Damage | How developed your existing attacks are | Strengthen an attack when suitable upgrades appear |
| Group coverage | Enemies gathering around your route | Add or improve attacks that reach multiple Bloons |
| Position | Open space near your Hero | Move away from crowded boundaries before confinement |
| Boss requirement | Minions or waves affecting the fight | Handle the relevant enemies before refocusing on the boss |
For example, if MOAR’s waves repeatedly surround you, focus your next attempt on clearing groups and maintaining an opening. If O.R.B. stalls your progress, check its minions before deciding that your boss damage needs another upgrade.
Replay with a clear purpose. Earlier checkpoints and boss battles have one-time rewards that do not repeat on replay, so avoid planning progression around collecting the same boss reward again.
Keep the next change focused. Adjust an upgrade priority, improve your positioning, or make better use of accessible healing. Then watch whether that change addresses the problem that ended the previous attempt.
FAQ
Which Bloons Blitz bosses are named in the game?
The named bosses include MOAR, CTRL, Wild Zebra, O.R.B., Super Ceramic, and Mini MOAB. MOAR releases additional Bloons, CTRL sends Bloons toward your Hero, and O.R.B. requires you to defeat its minions before damaging it.
How do you damage O.R.B.?
Defeat the minions O.R.B. summons first. They must be killed before the boss can take damage. If progress against O.R.B. stops, look for remaining minions and reposition so your team can reach them.
Does beating a boss always finish the stage?
No. A boss victory can either complete the stage or let regular gameplay continue. When you defeat a boss partway through a stage, the enclosing shield gradually disappears.
What should you prioritize before a boss battle?
Collect reachable Blops, develop your attacks, and use accessible healing when needed. Watch for the boss warning, then move toward open space so the enclosure catches you with room to maneuver.
Continue with
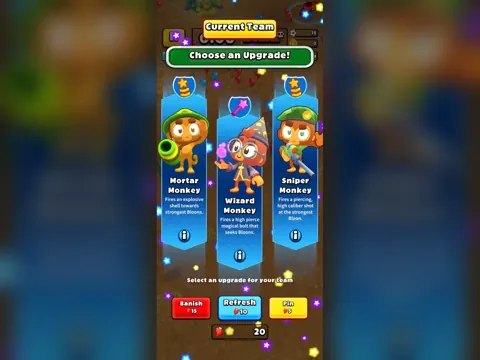 Bloons Blitz Beginner Guide: Build a Strong Team – ExplainedLearn how movement, upgrades, monkey choices, rewards, and currencies work in Bloons Blitz with practical tips for new players. Includes tables and an FAQ.
More in Guide
Bloons Blitz Best Monkeys: Mortar Synergy and Team Choices
Explore Bloons Blitz monkey choices, Mortar attack-speed synergy, and fire coverage while considering the pressure of collecting XP during a run.
Bloons Blitz Level Up Guide: Hero Toys and Run Upgrades
Understand Bloons Blitz hero leveling, collectible toys, stickers, and run upgrades, with practical tips for planning your monkey team and next battle.
Bloons Blitz Upgrades: Team Building and Run Progression
Understand Bloons Blitz upgrades, hero and ally roles, Blop collection, permanent progression, and practical choices for surviving boss battles.
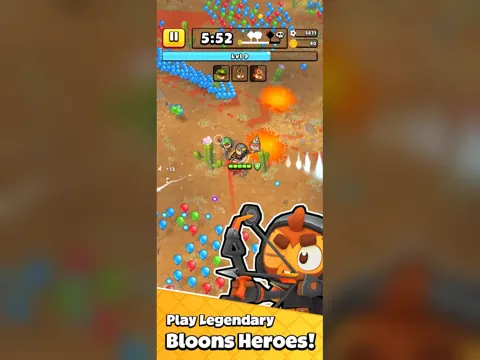
Bloons Blitz Hard Challenge Guide: Plan Your Run – Explained
Plan a Bloons Blitz hard challenge run with tips on Heroes, allies, Bloons, encounters, upgrades, special areas, and boss battles, plus a short FAQ.
Join the community
Official channels for news, updates and player help: